Say the truth. Loading games up from both cassette tapes and floppy disks is a tiresome ordeal by today's gaming standards. Luckily enough there are plenty of alternatives on offer for a wide selection of classic home computers, and the Commodore Amiga just got another: a floppy disk hardware emulator.
A floppy disk hardware emulator is a device that emulates a mechanical floppy disk drive with a solid state or network storage device that is plug compatible with the drive it replaces.
Floppy disks and floppy drives are gradually going out of production and replacement of malfunctioning drives, and the systems hosting them, is becoming increasingly difficult. Floppy disks themselves are fragile, or may need to be replaced often. An alternative is to use a floppy disk hardware emulator, a device which appears to be a standard floppy drive to the old equipment by interfacing directly to the floppy disk controller, while storing data in another medium such as a USB drive, Secure Digital card, or a shared drive on a computer network. Emulators can also be used as a higher-performance replacement for mechanical floppy disk drives, even though because the interface to the floppy drive is very low-level, emulators must maintain the approximate timing of floppy disk operations. This may require the emulator to provide buffering, with some delay in updating the permanent storage.
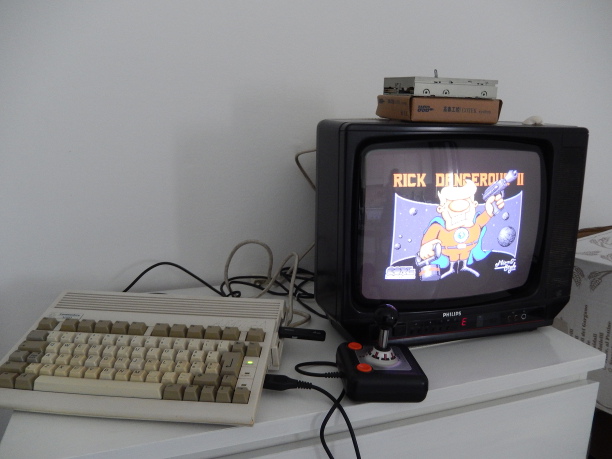
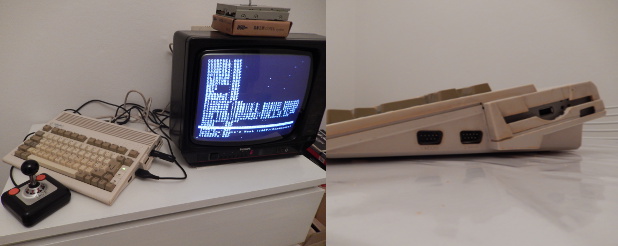
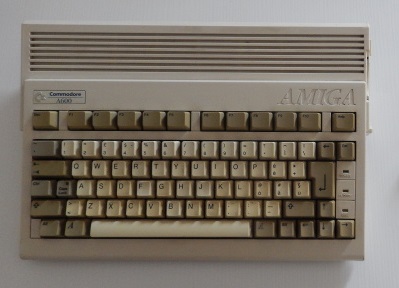
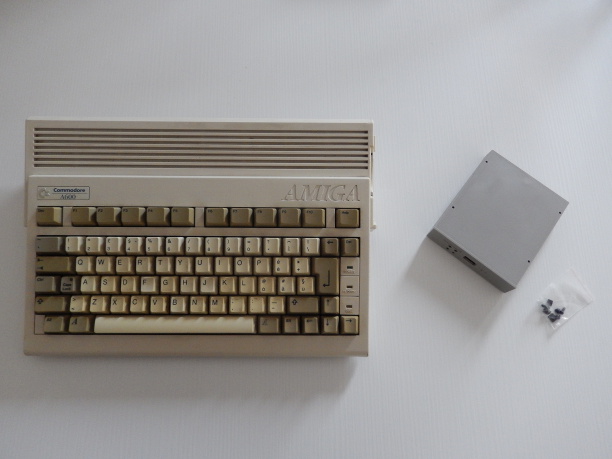
A few weeks ago, while putting in order my computers, an old Amiga 600 came back to light. I bought that machine almost 15 years ago at a second-hand market for few euros. It was fully working and sold with a mouse, joystick and a lot of floppies. I test it, but sadly the floppy drive had problems at loading. At the beginning I was looking for a new floppy drive, but in a second moment I decided to try one of these devices. I will show you the results in the following. With this new device I can play my favorite games on a real Amiga machine in no time as now I am able to boot up just about every game from a USB dongle!
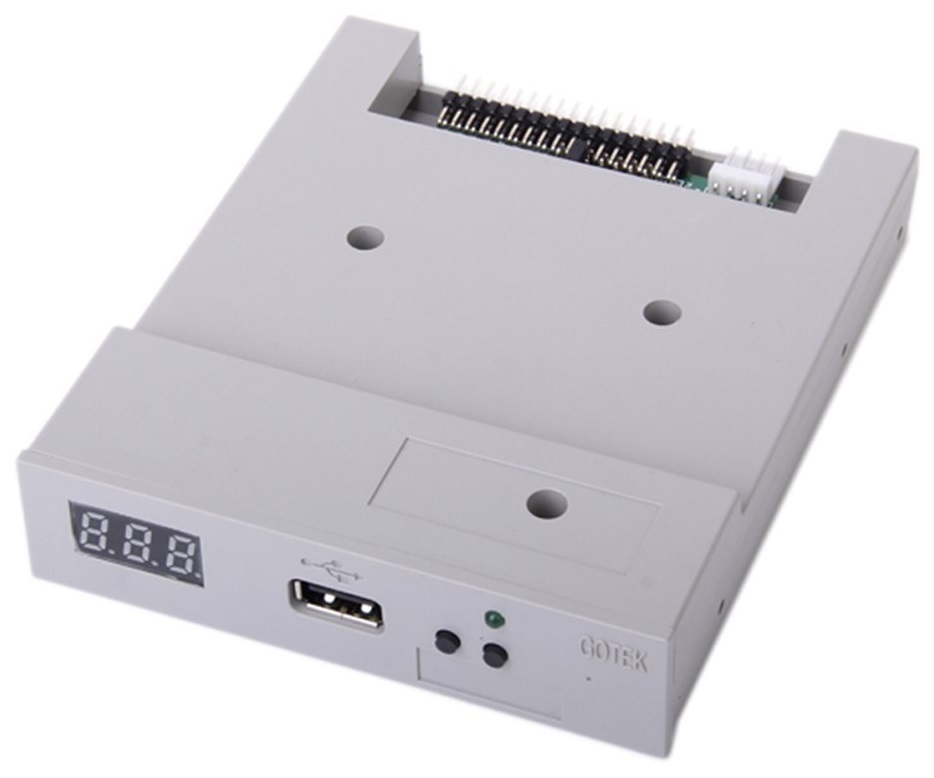
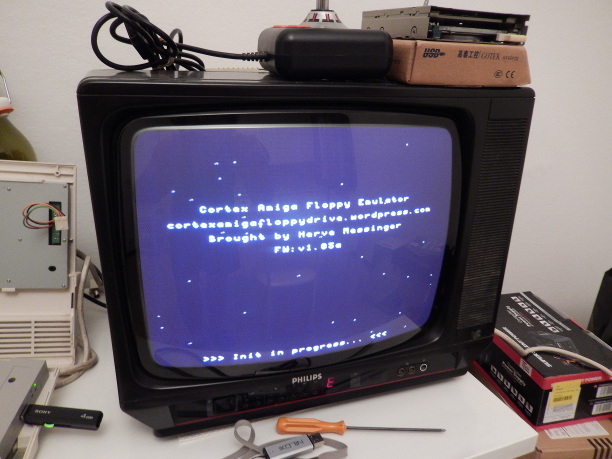
I bought the GOTEK Floppy Emulator - a USB SSD Floppy Drive Emulator - from a Chinese shop on ebay for US$23,37 (circa €17), free shipping! It is the version without the LED display. And then I adapted it for the Commodore Amiga by using a firmware written by a Commodore enthusiast (http://cortexamigafloppydrive.wordpress.com/) to support/emulate the Amiga sectors encoding scheme. This firmware allows to load any ADF file present on the USB key and play it on the Amiga! A special boot ADF file allows to select file to start.
Here is what I used:
- Commodore Amiga 600
- An ICP (in-circuit programmer): USB to TTL Adapter

- A GOTEK floppy emulator
- The STMicroelectronics Flash loader software available HERE
- The mentioned firmware available HERE (note: change the file extension .docx to .zip)
Then I followed three simple steps, detailed in the following.
STEP 1: Update GOTEK firmware
First of all I had to solder a stripline to the Gotek emulator board as programming port (8 pins).
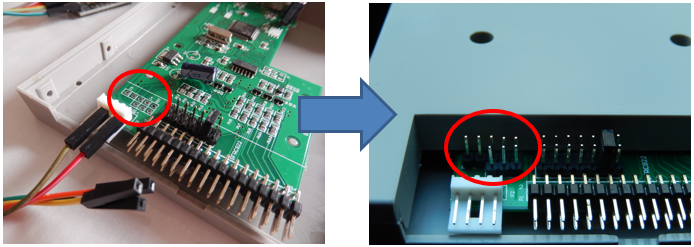
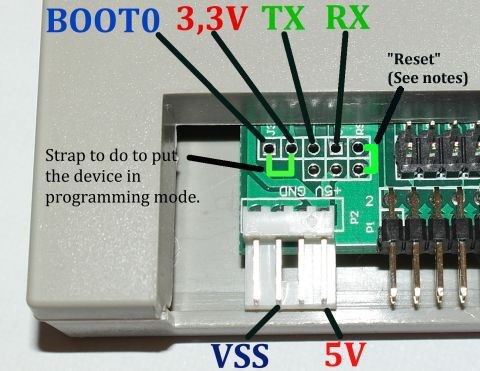
After that, download and install the ST flash loader and connect the GOTEK device to your PC through the USB-TTL adapter, following the connection list below:
| Gotek Emulator | USB adaptor |
|---|---|
| TX | RX |
| RX | TX |
| 5V | 5V |
| Vss | Ground |
And then connect BOOT0 to 3.3V with a jumper to put the device in programming mode at power up.
If your PC does not recognize the adapter download and install the proper drivers.
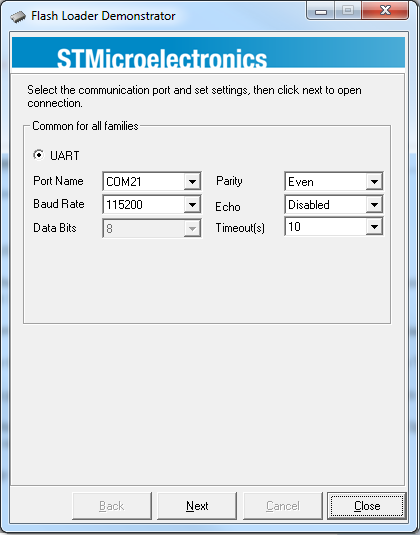
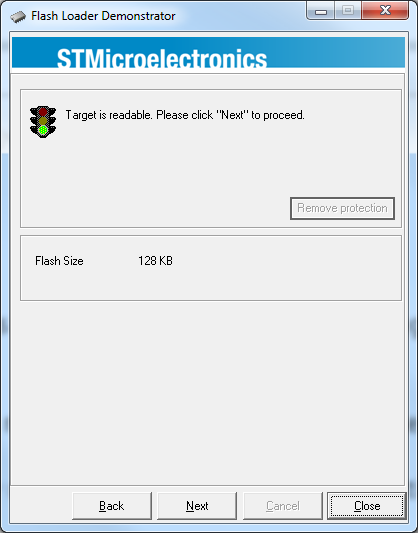
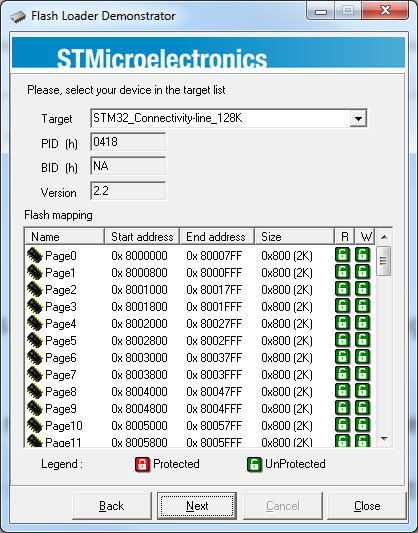
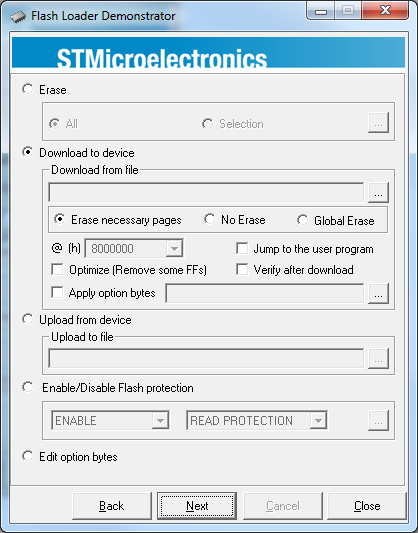
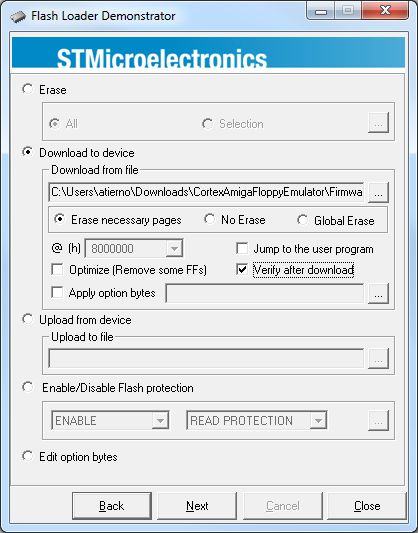
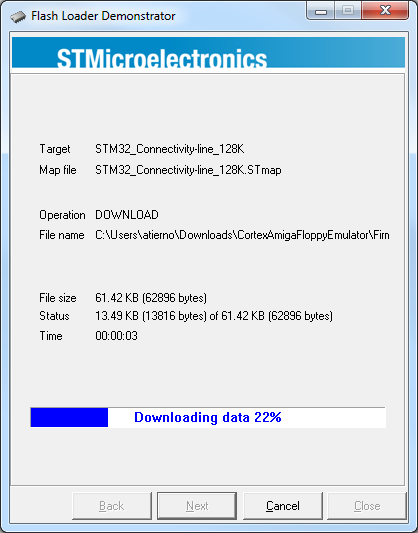
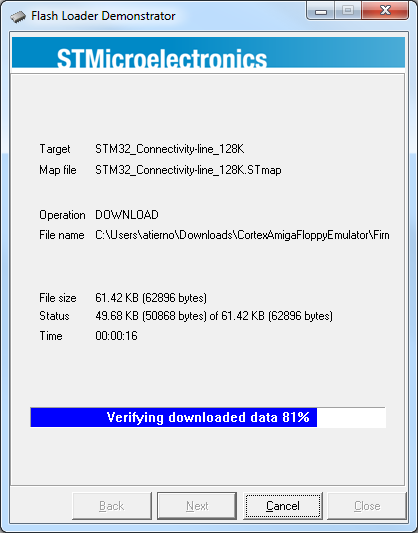
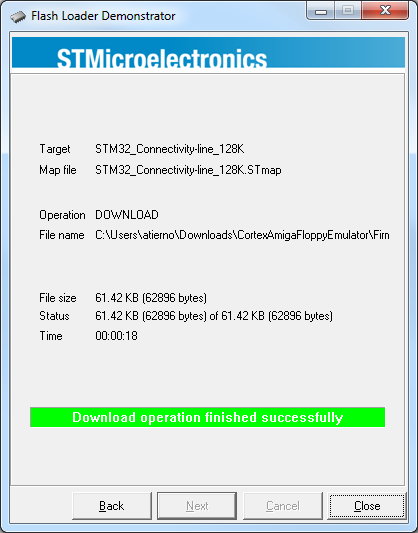
Then, run the ST flash loader, select the proper COM port (if you are not sure what the right port is, plug the adapter after the ST loader has started, so the new port will be the right one) and just follow the instructions. The screenshots of the entire firmware installing procedure follow (hover to enlarge).
Trouble shooting: I had some difficulties to make the connection between the device and the software. If you encounter the same problem you can try to reset the emulator. To do this connect the "RST" signal (present at the right of the RX signal) to the ground for 1 second. Please note: do not disconnect the RX/TX and Power wires during this operation. Once done, start again the software. Do not lose heart: I had to do this procedure almost 30 times to get the GOTEK firmware updated!!! And I did not figure out what the problem was (the soldering points? The adapter? Windows?).
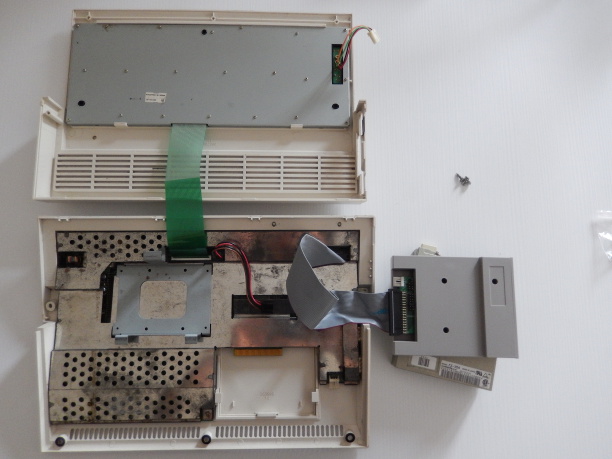
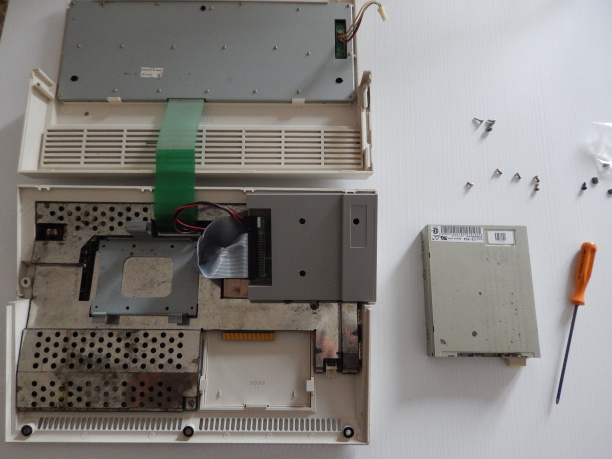
STEP 2: Connect GOTEK to the Amiga
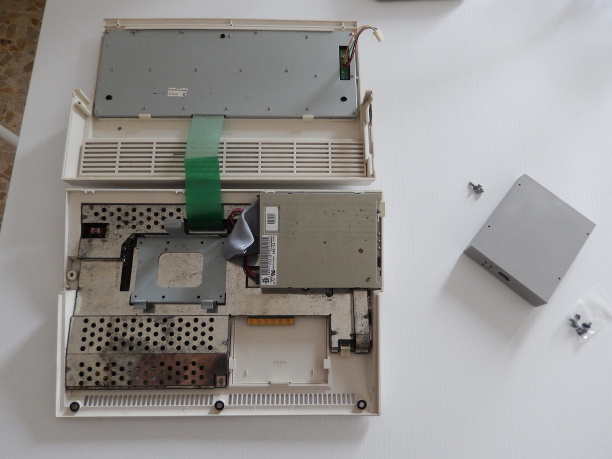
Open the Amiga and connect the Gotek instead of the internal floppy drive.
STEP 3: load ADF files on the USB dongle
Load boot ADF image (and all the other ADF images you want) on the USB dongle.
Trouble shooting: I had to try different USB dongles.
To complete, I shaped the chassis at the entrance of the disc to plug in the USB dong more easly.

And here is the final result:
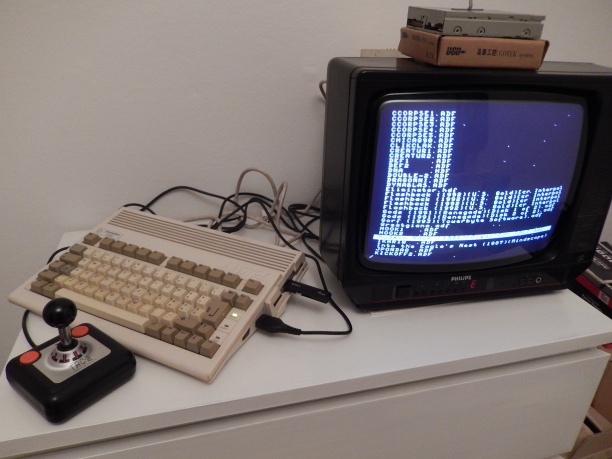
Ready to play my favourite games!!!